Gobble Goods
A rustic “Boho” turkey necklace and earrings project.
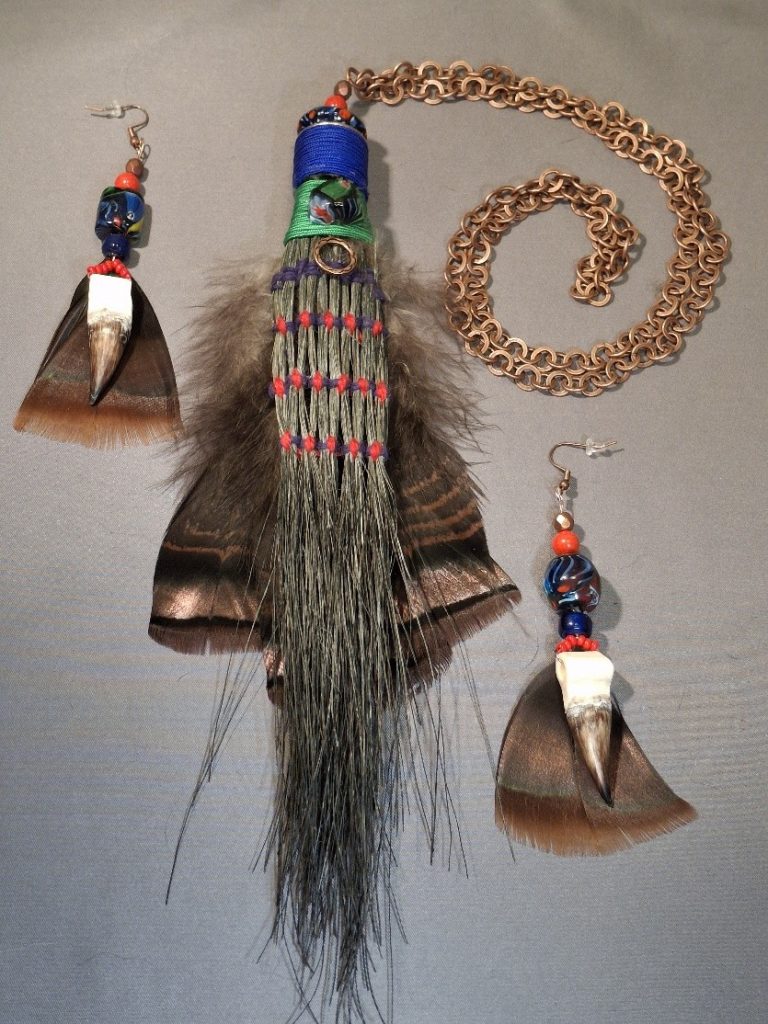
Celebrate your spring turkey by turning your trophy beard and spurs into something uniquely you! A necklace and earrings are sure to draw compliments, even if it is, “Um, that’s really neat … but what is it?” Check out your bead and jewelry hardware stash first or visit a craft store for special beads and baubles that will convey your eclectic “boho” or bohemian vibe.
Enjoy the process of coordinating the copper or bronze iridescence of the turkey feathers with metal findings. The turkey beard will be woven with colored cording. Coordinating cording colors with the beads will unify your art piece and earrings.
Supplies
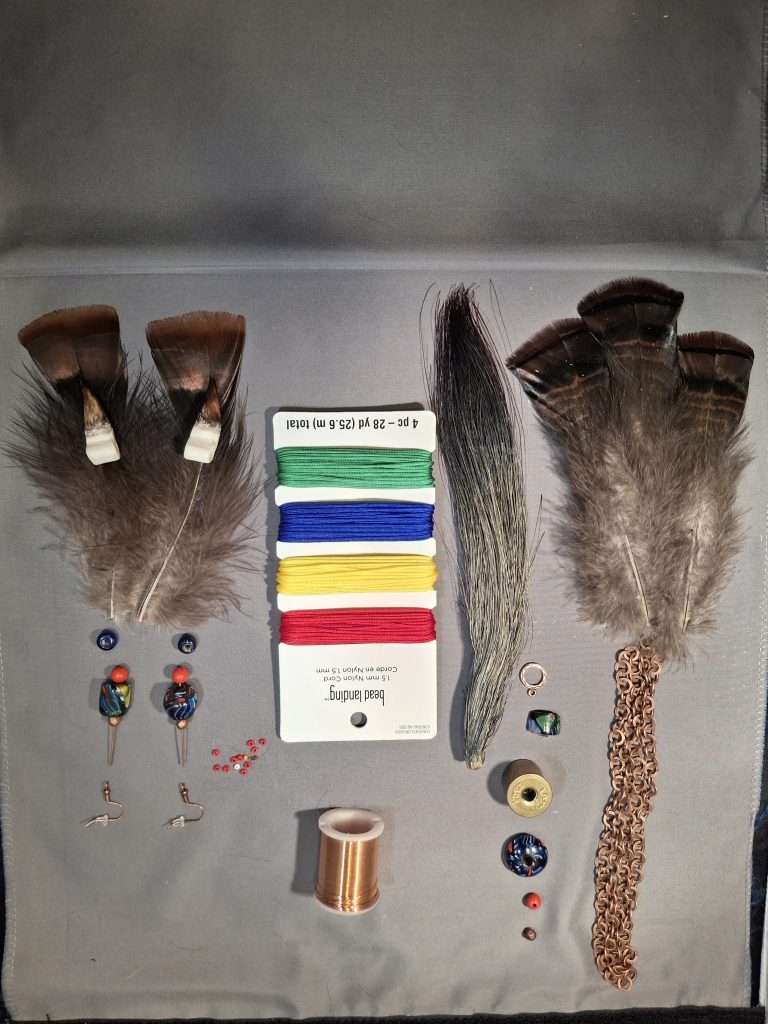
- Turkey beard (cleaned and preserved by putting the end in borax)
- 2 turkey spurs with tendon hole intact (cleaned and sharp edges sanded)
- 1 spent shell casing
- Hot glue stick
- 3 special focal beads (one for beard and two for earrings)
- Accent beads of choice and seed beads (to surround the focal bead)
- Cording to match beads (yarn, cotton or nylon craft cord)
- 5 6-inch uniform tail feathers (with the iridescent stripe from the tail, closest to the body)
- Beading wire (copper looks nice, 24 gauge or thin enough to go through beads twice)
- 2 earring wires (copper metal)
- 32-inch necklace chain (in matching metal)
Tools
Vice, scissors, hammer, awl, hot glue gun, wire cutter, needle-nose pliers, tapestry needle (with large eye for cord)
Necklace
1. Shell Hanger Hole
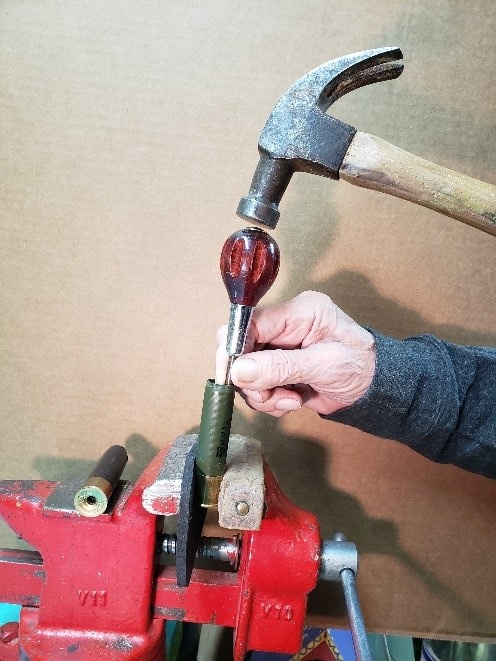
Place an empty, spent shell casing in a vice, being careful not to bend the brass. Center the awl inside the casing and use the hammer to punch out the primer. With scissors, trim off the plastic sleeve from the metal casing.
2. Prepare the necklace for decorating
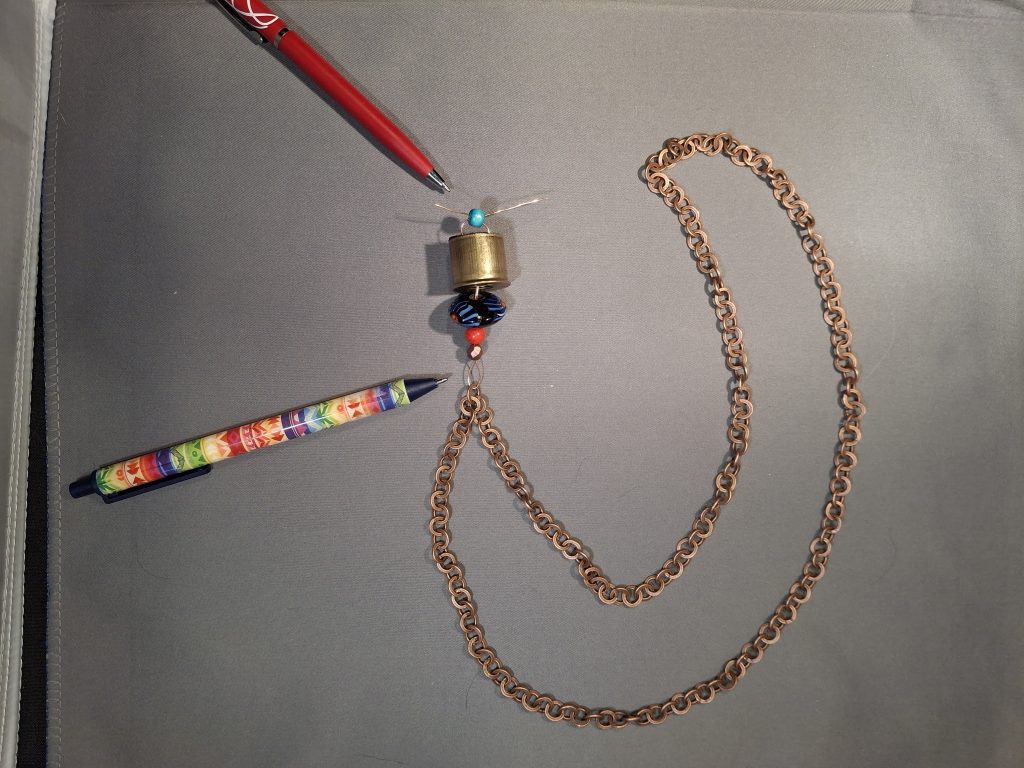
This necklace is designed to go over the head without a clasp. Join chain ends by opening a link with the pliers. Cut about 8 inches of wire and thread through one link of the chain. Thread those ends of the wire through beads of choice and then through the shell casing. Thread the ends of the wire through a securing bead in opposite directions and pull tight. Twist the wires; this will hide the bead inside the casing and keep it from pulling out.
3. Beard weaving
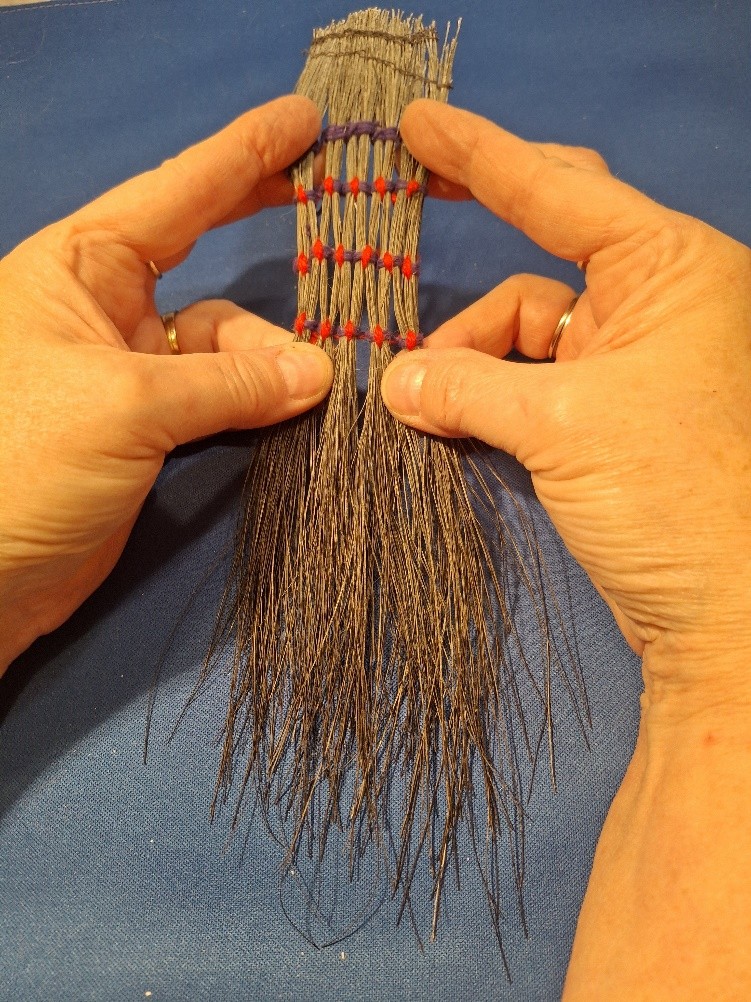
This step makes the beard flatter so you can weave with the cord. You can either stitch across it by hand with a thread that matches the beard (so it is sort of invisible) or use a sewing machine to stitch across the upper portion of the beard and cut off the knob at the top or leave it, if you wish. Do the weaving before you hot glue the beard into the shell casing.
Thread the tapestry needle with the cord color of choice (blue in this case). Separate the beard into 10 clumps as you go and encircle each clump with a continuous cord for the first row. For the second row, separate each previously isolated clump in half and connect to half of the clump next to it by encircling this newly formed clump. Continue in this fashion as far down as you wish. Finish the weaving by using a different color cord (red in this case) and stitch vertically at each juncture. This serves to separate and define the pattern and add some pizzazz. Note the top row does not get a vertical stitch.
Arrange and hot glue three of the 6-inch feathers into the casing. Glue the beard into the casing.
4. Cord wrapping
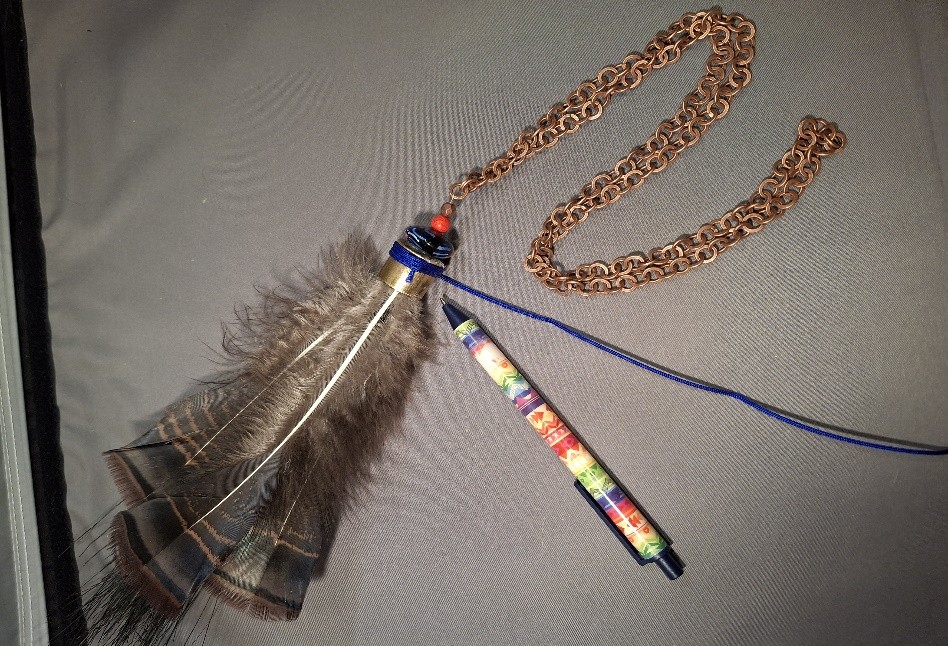
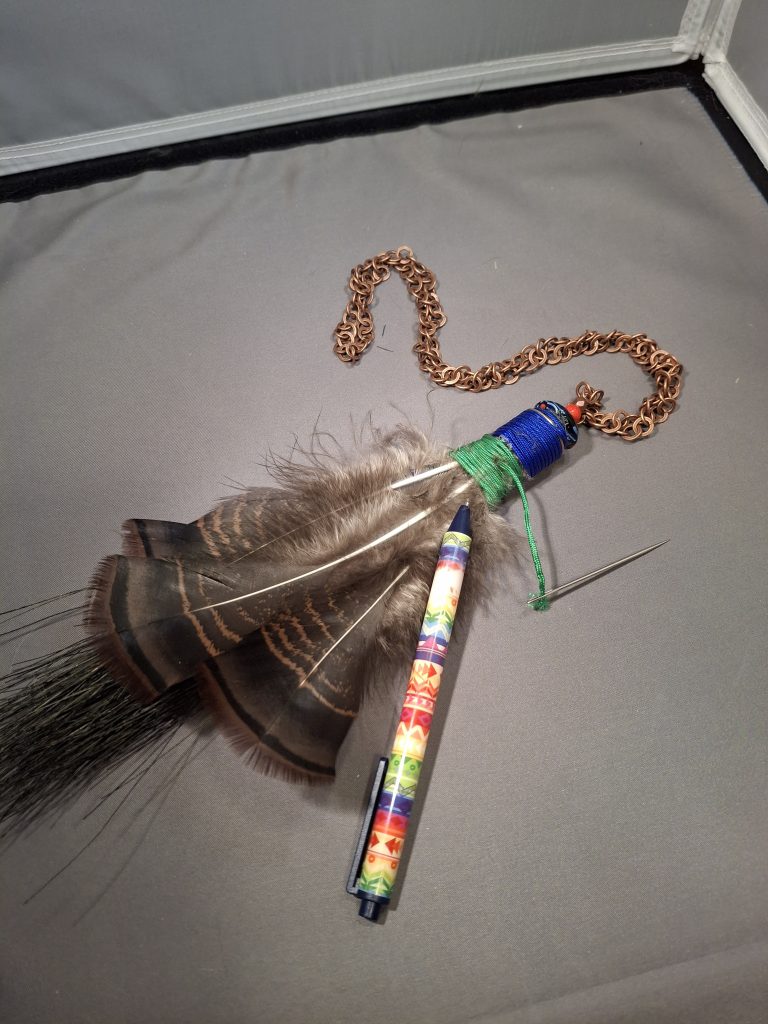
Decide if you want to hang any additional bead or decoration and affix to the top of the beard. Select the cord colors and use a drip of hot glue to secure the cord end and wrap the cording around the casing and beard top. Thread the needle with the cord and bury the cord end. Continue with different cord colors wrapping onto the top portion of the beard to hide any stitching used to “flatten the beard.” You now have a lovely and very unusual necklace.
Earrings
1. Prepare the spurs and feathers
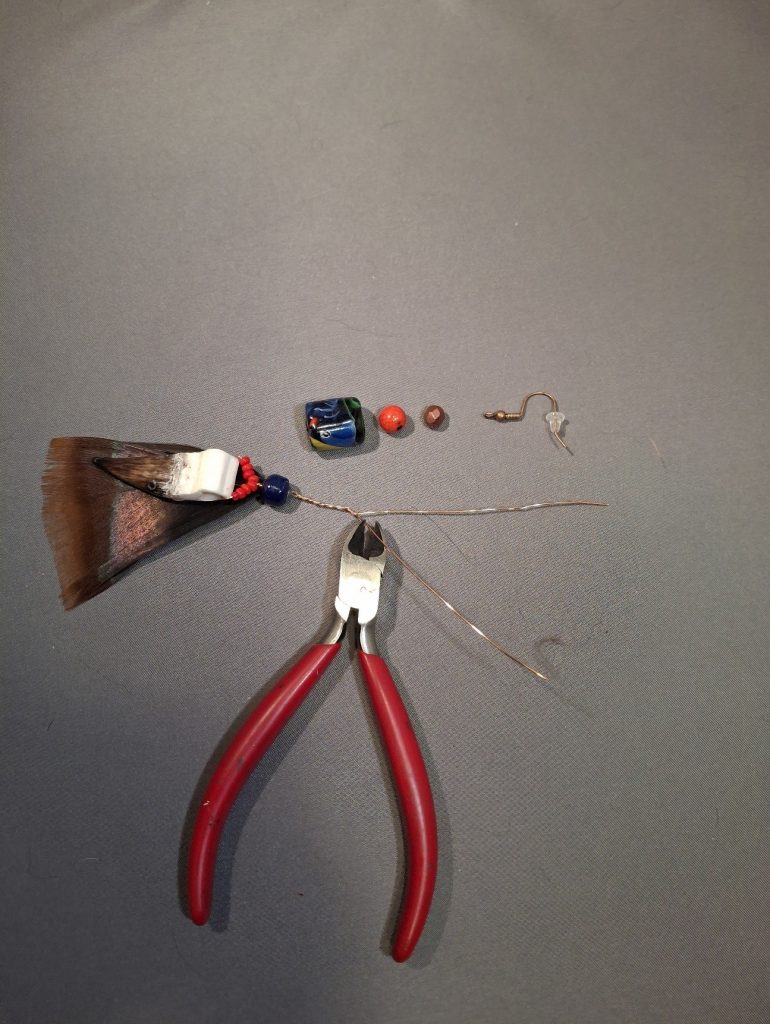
Using two of the five, 6-inch feathers, strip off ‘the fuzzies’ by pulling them off the feather vein toward the nib. Allow about 2½ inches of the pretty copper end of the feather to remain and leave the long vein attached to the feather for now. Decide if you want to wrap any cord around the spur tops and do it now (I chose not to).
Take about 10 inches of wire and feed it through the hole in the spur. You may want to use 8 seed beads to cover the wire as it meets at the top of the spur; twist to secure. Add a bead and use a drop of hot glue to secure the feather vein inside the bead. Clip the feather vein, twist the wires and clip off one of the two wires so only one remains.
2. Finishing the earrings
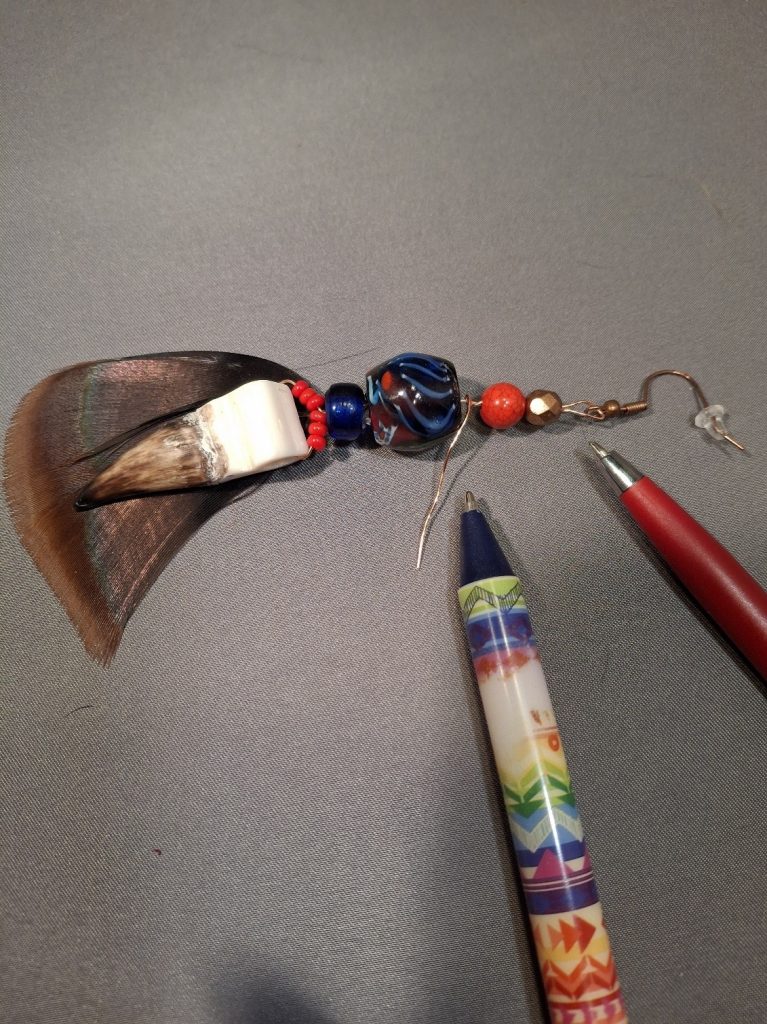
Thread the desired bead(s) onto the single wire and through the earring loop. Using the needlenose pliers, bend the wire into a loop and feed the wire back through a few beads, twist and clip. You have just created a piece of wearable art!